

The past few fall seasons have given an upgrade to the tradition of carving and decorating pumpkins. This fall, the trend has been given a funky makeover, literally, with paint. DIY bloggers, Pinterest, YouTube – any search on these sites or even Google will give you a enough ideas for the next 20 fall seasons. So naturally, some of the girls at Relevé Public Relations got together to get in on the painting fun. I mean honestly, what fall-lover wouldn’t?! We took a few minutes to look at some of the tons of ideas the inter webs had to offer, and then decided to just wing it and dive right in. The next 4 hours were a mess of laughing at ourselves, glitter, and ahem, impatience. By the end, we had come to a few conclusions about what we’ll do next year… starting with smaller pumpkins. Read on to find out the rest.

Spray Paint is Your Best Friend – For accents or smaller patches of paint (and mini pumpkins), acrylic paint works perfectly. But for painting an entire larger or average-sized pumpkin? Stick with spray paint – it may not dry any quicker depending on the brand’s instructions, but it will be easier. Just trust us. Use masking or painter’s tape to achieve clean lines, making sure to pull the tape away before the paint dries.
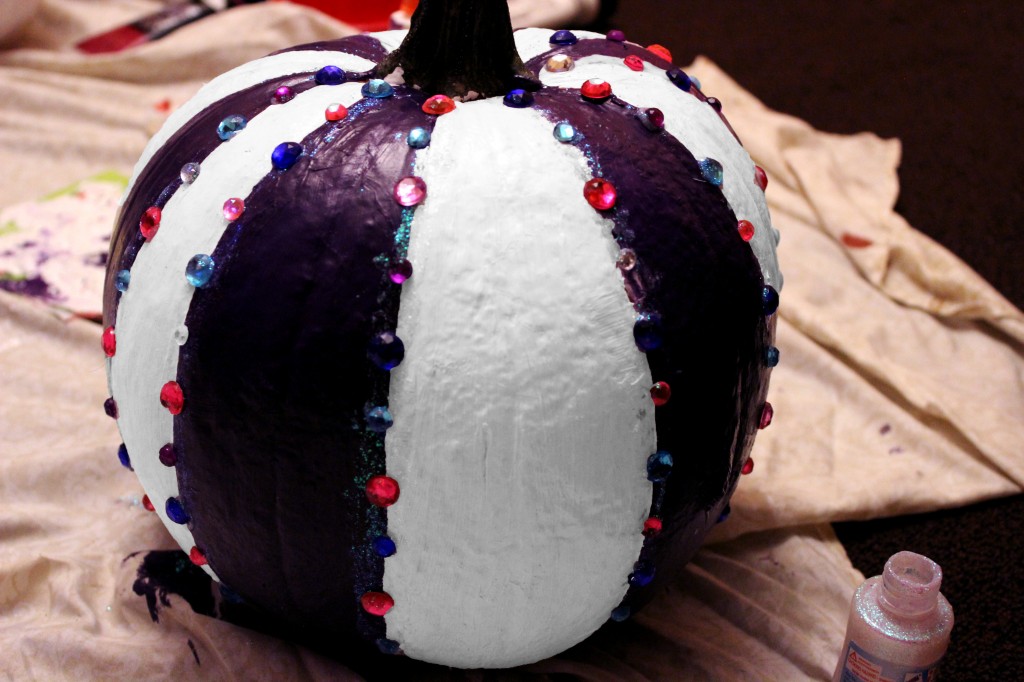
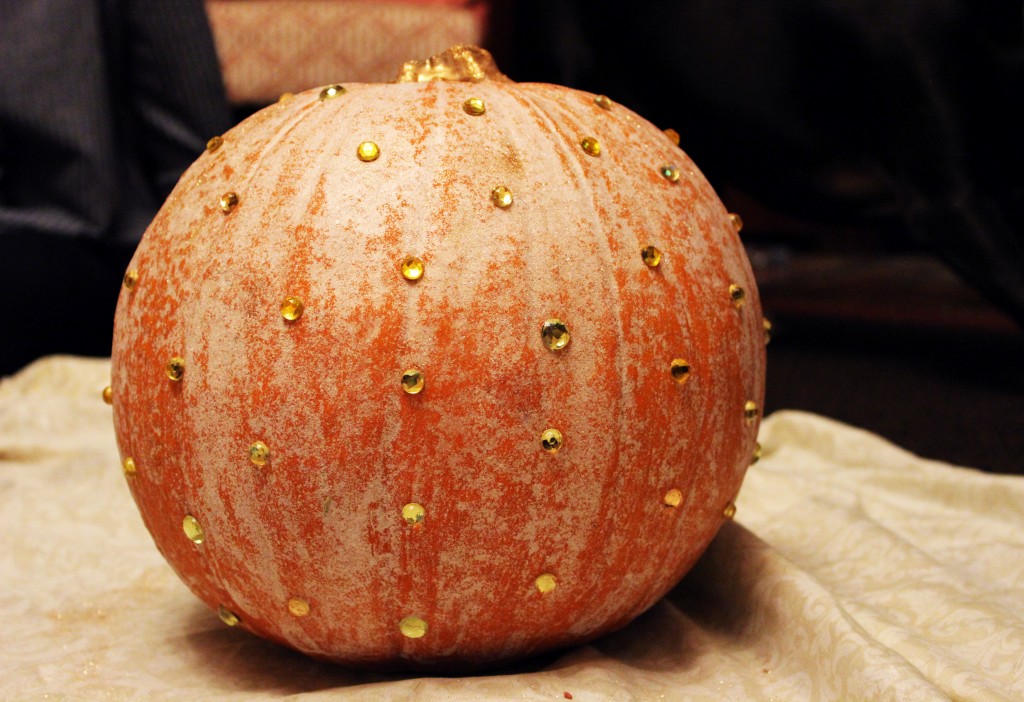
Approach Glitter With Caution – Here at Relevé, we NEVER turn down a chance to get our sparkle on. But we don’t like the idea of wasting glitter or creating a huge mess (although we did enjoy the trail that was left anywhere we went). Glitter “paint” formula = Mod Podge + Glitter, or even white school glue mixed with a little water if you don’t have Mod Podge. It’s that simple. And it will save your sanity. Apply multiple coats to get the perfect sparkle.
No Shame in Going Faux – The real deal brings up nostalgic feelings for us of carving and baking pumpkin seeds, too. Sadly, though, real pumpkins aren’t always the smoothest of surfaces. To save yourself the aggravation of searching and searching for the “perfect canvas”, buy them foam or plastic. They don’t rot, can be reused (or repainted), and come in a variety of shapes and sizes just like their actual counterparts. Keep the one you find at the pumpkin patch for carving.

Cut It Out – A). Not everyone is Van Gogh-protégé status and B). Painting/drawing on round objects can be hard, whether they’re real or fake. Use stencils or make your own by drawing and then cutting out the necessary parts with a craft knife or extra sharp scissors. Some of the prettiest ideas we saw used simple shapes and patterns.
The Best Laid Plans… – The whole point of any DIY project is to let your creativity shine! An overall plan isn’t a bad idea, but mistakes are welcome, even sometimes encouraged. If your chevron stripes aren’t perfect – who cares? You meant for them to be that way 😉